This article will show your how to live stream from your RetroPie directly to Twitch.com.
If you want to stream from your RetroPie to Twitch you will first need to get gameplay recording working (installing FFmpeg and rebuilding RetroArch with FFmpeg support) which you can do by following along with my earlier post: How To Record A GamePlay Video From A RetroPie
Once that is set up the next steps are pretty simple, I thought that it would be more difficult but it turns out it’s pretty straight forward to get a RetroPie to stream something to Twitch.
The big problem is the performance of the games as you are playing them. The performance is alright but I’d love to be able to up the quality a bit without having the games slow down as you play them, but I thought that I would post this and maybe a reader who knows FFmpeg better than I do could give me some tips.
If you want to stream to Twitch you will need a Twitch account (of course) to do so visit: https://www.twitch.tv/signup and signup.
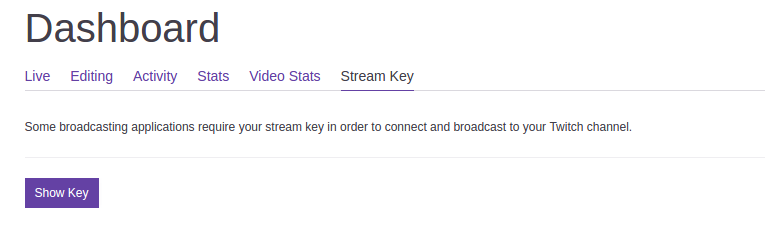
Once you have an account you will need your Twitch stream key. You can get this by visiting the ‘Stream Key’ tab on your twitch dashboard at the following URL:
https://www.twitch.tv/<>/dashboard/streamkey
From there hit the ‘Show Key’ button and grab your stream key.
Note: Keep your stream key private. Anyone that has it can stream to your Twitch account, and you don’t want that happening.
Twitch Config File
Now that we have our twitch account setup we will need to create a Twitch config file for FFmpeg so that the recordings it does are compatible with the Twitch servers.
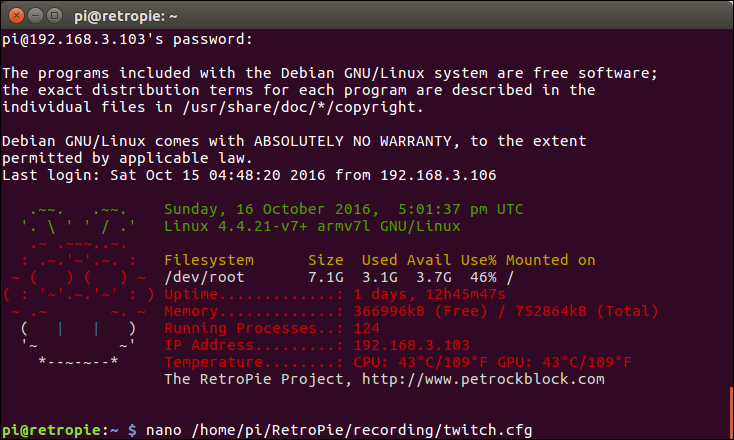
To do that ssh into your Raspberry Pi and use the following command to create the config file:
$ nano /home/pi/RetroPie/recording/twitch.cfg
I based my config file off of what I found on the RetroArch wiki however when ever I had my audio codex set to ‘libmp3lame’ I would get a “bus error” at the following location: ‘/opt/retropie/supplementary/runcommand/runcommand.sh: line 855: 16499’
Switching to ‘aac’ as the audio code solved the issue and got me streaming to Twitch, however there were lots of lag issues, so I spent a long time configuring the settings trying to get the games to play smoothly locally and stream at the same time.
In the end these are the settings that I settled on:
Where $$STREAM_KEY$$ is the stream key that you got from your Twitch account earlier.
Then save (CTRL+O) and exit (CTRL+X).
Note: You may want to check out the list of Twitch servers and choose one that is the closest to you.
Streaming Your Gameplay
That’s it for the setup. Now you can go into the NES section on your RetroPie and start a game. While the game is loading hit the ‘A’ button to enter the configuration and select ‘Select emulator for rom’. There you will see the new ‘lr-fceumm-record-twitch’ entry that we added. Select it (it will now be the default so be sure to change it if you don’t want to stream next time you play.) and when you launch the game you should now be streaming to twitch.
If you saw my last post you probably know that I’m into retro video games. What you might not know is that I do my retro gaming using a RetroPie. I can take screen shots of my games while I’m playing, but the RetroPie does not come with the built-in ability to create game play videos. As a result I did some Googling and found a fantastic blog post detailing how to accomplish this on RetroResolution.com: Recording Live Gameplay in RetroPie’s RetroArch Emulators Natively on the Raspberry Pi. The following is a log of how I accomplished this following RetroResolution’s instructions.
Everything I did here I did on an Ubuntu machine running 16.04 LTS. I’m sure you can do all of this Mac box without any changes, but on Windows you’ll need Bash (Windows 10) or an equivalent installed to ssh and perform the backup. If you follow along and if everything goes well I would expect this to take about one full evening.
Note: This post is basically my implementation of the details laid out on retroresolution.com. Be sure to read the original author’s post for all the nitty-gritty details.
Warning
This worked for me but please be careful when following the instructions and be sure to backup all your SD Card before proceeding. Proceed at your own risk.
Backup
Before starting anything we should backup the Rsapberry Pi’s SD card so that we can get RetroPie running again if we break anything. To do this I plugged my retro pie into my USB to SD Card reader and then plugged it into my computer.
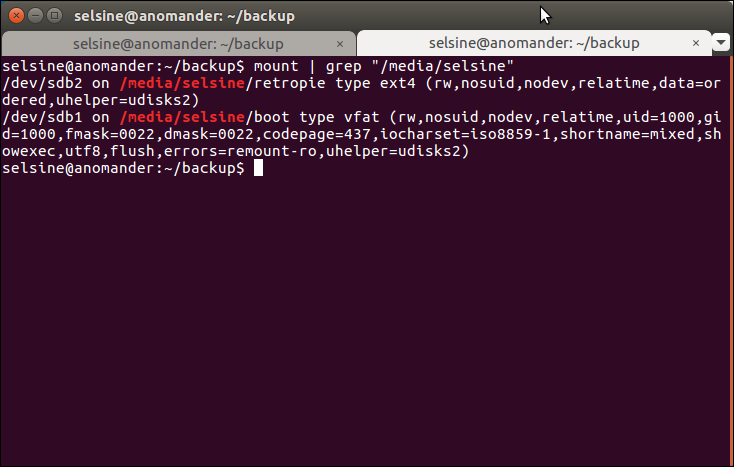
The USB was mounted to ‘/media/selsine/’ as two partitions: ‘/media/selsine/boot’ and ‘/media/selsine/retroppie’. But I didn’t want to backup each partition separately I wanted to backup the entire SD Card. To do that I needed to figure out which disk in ‘/dev/’ was the SD Card. To figure that out I used the following command:
$ mount | grep "/media/selsine"
The output showed me that the two partitions from the SD Card were under ‘/dev’ as ‘/dev/sdb1’ and ‘/dev/sdb2’ that meant that I needed to backup ‘/dev/sdb’.
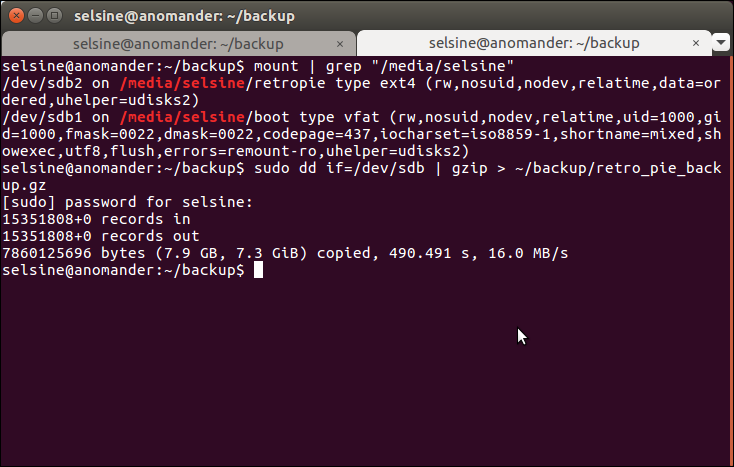
I did so using the following command which created a compressed image of the disk in a folder named ‘backup’ in my home directory:
It took about 15 minutes for the backup to complete so go do something interesting while that happens. After that I popped the SD card back into the Raspberry Pi and starting working.
Note: Use the following command to restore if something foes wrong:
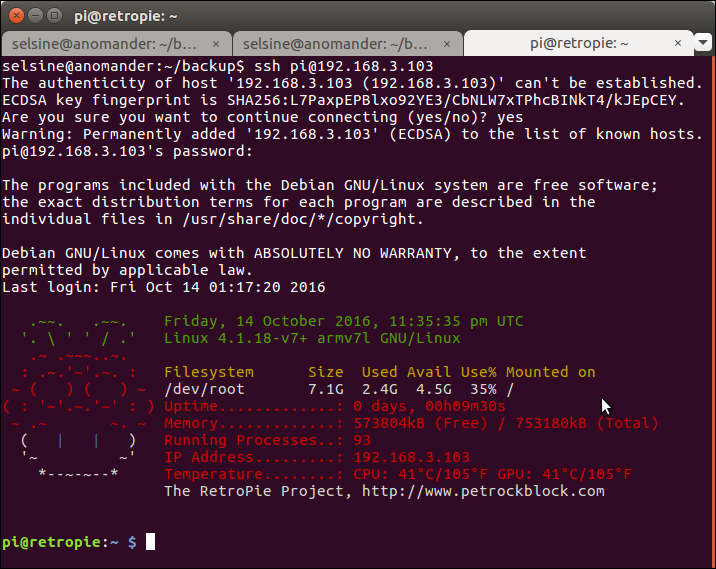
Much of what we need to do we will do by ssh’ing into the Raspberry pPi. To do this you will need the IP address of your RetroPi on the local network. You can get this by going to the RetroPi setup within RetroPie and then selecting “Show IP Address” from the menu. Once you have your IP address you are good to go.
Then you can SSH into the RetroPi using the following command (where 192.168.3.103 is your retro pie’s IP address:
$ ssh pi@192.168.3.103
NOTE: The default login to a RetroPie is: User=pi Password=raspberry
Update
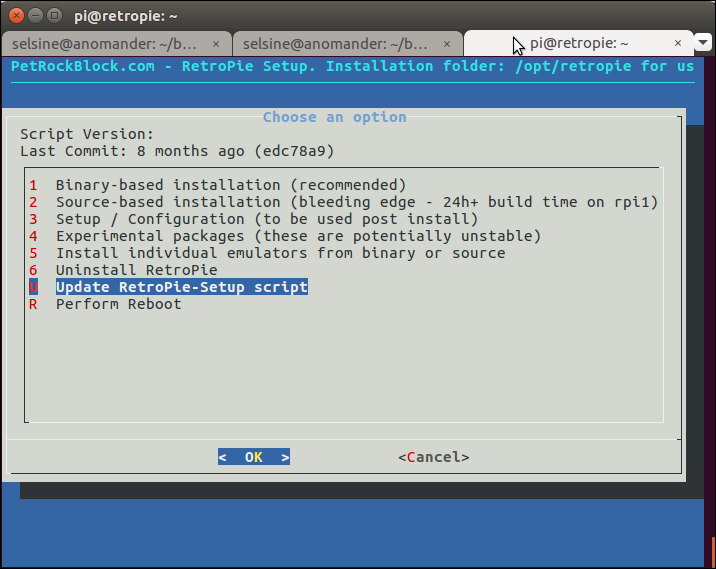
Before going any further I recommend that you update your RetroPie to the latest version of RetroPie. The makes sure that you don’t run into any issues where you’ve updated one part of RetorPie but not another. To update your RetroPie ssh in and run the following command:
sudo ~/RetroPie-Setup/retropie_setup.sh
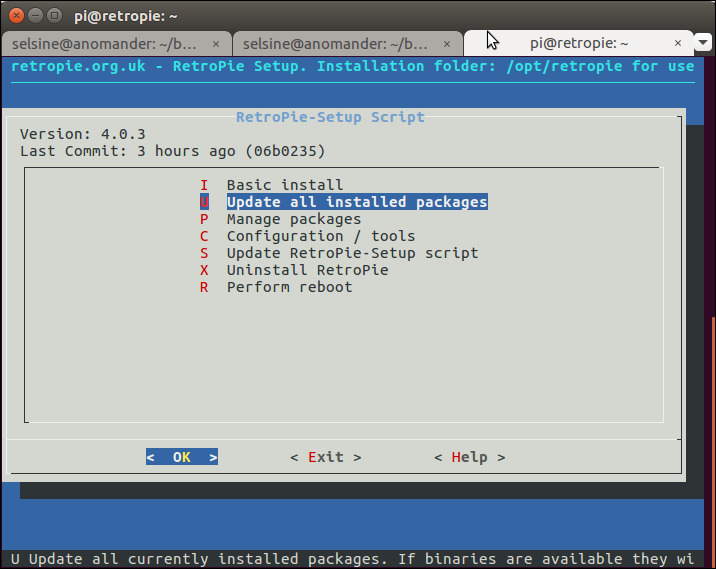
This will bring up the RetroPie setup screen:
From there select ‘Update RetroPie-Setup script’ to update the setup script.
After that we will update all installed packages via the ‘Update all installed packaged’ menu item. Once all of that is done we are ready to proceed.
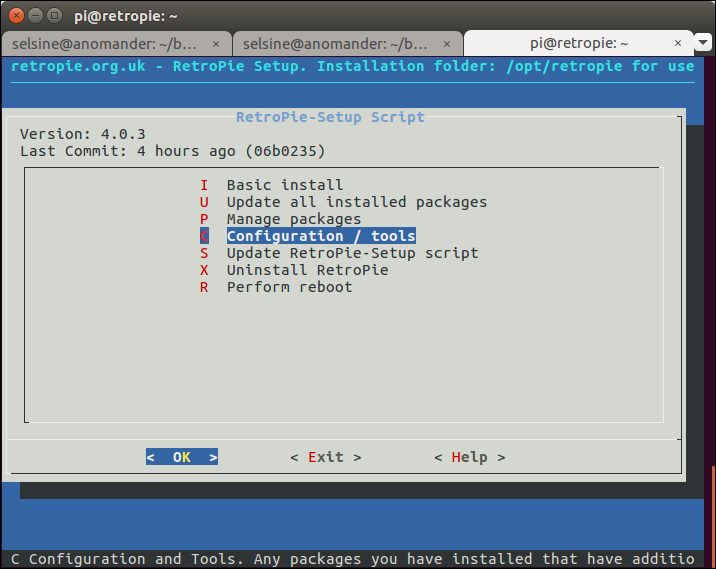
Note: My splash screen stopped loading after this, so in order to fix that select “Configuration / tools” from the menu:
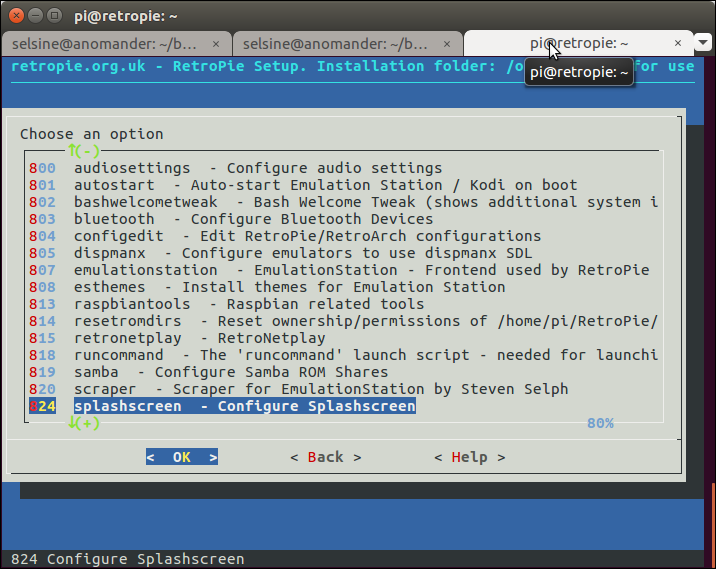
Then ‘splashscreen – Configure splashscreen’
The select “Choose Splashscreens” | “RetroPie Splashscreens” | “retropie-default.png”.
You can also update your splashscreen from within the RetroPie settings inside of EmulationStation.
Install FFmpeg
As per the RetroResolution instructions the next step is to compile FFmpeg on the RetroPie. This is a relatively simple step since Retro Resolution has provided us with the complete script that we need to compile FFmpeg and it’s related codecs.
I recommend you read his article as it will walk you though all the why’s that I’m about to skip.
The first thing that we need to do is SSH into the RetroPie if you have not already (based on the above instructions). Now that we have logged in we need to create and execute a shell script that will install FFmpeg for us.
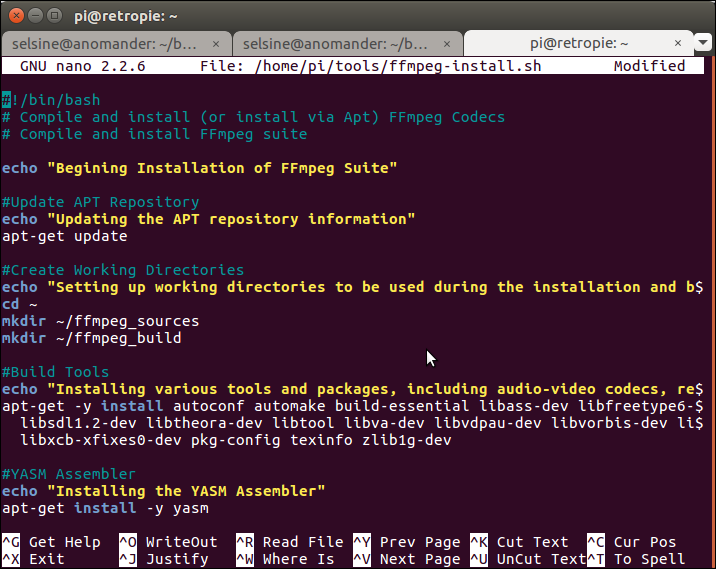
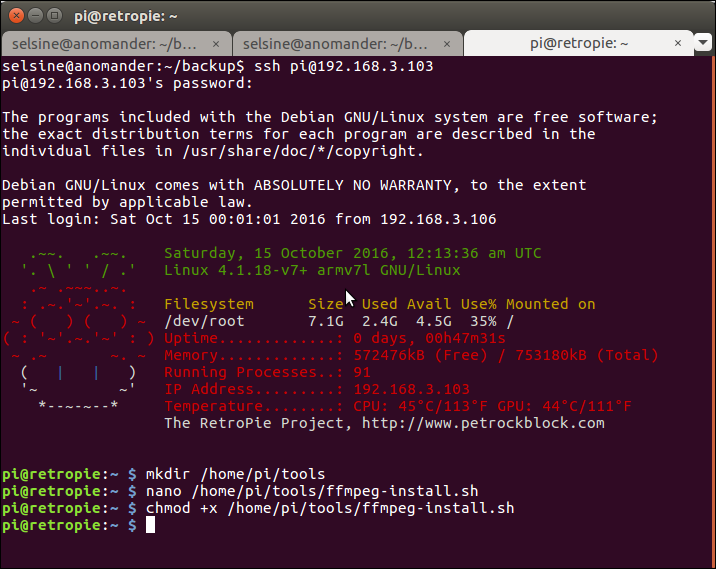
First we will create a “tools” directory in the “pi” user’s home directory and then create a script file within that directory:
The nano command: ‘$ nano /home/pi/tools/ffmpeg-install.sh’ will start the nano text editor and create the shell-script file “ffmpeg-install.sh” in the tools directory.
Then we need to copy the shell script from retro resolution into our nano editor.
Once you have pasted the script hit CTRL+O to save the file and CTRL+X to exit nano.
We are almost done with our script, we just need to make the script executable so that we can run it:
$ chmod +x /home/pi/tools/ffmpeg-install.sh
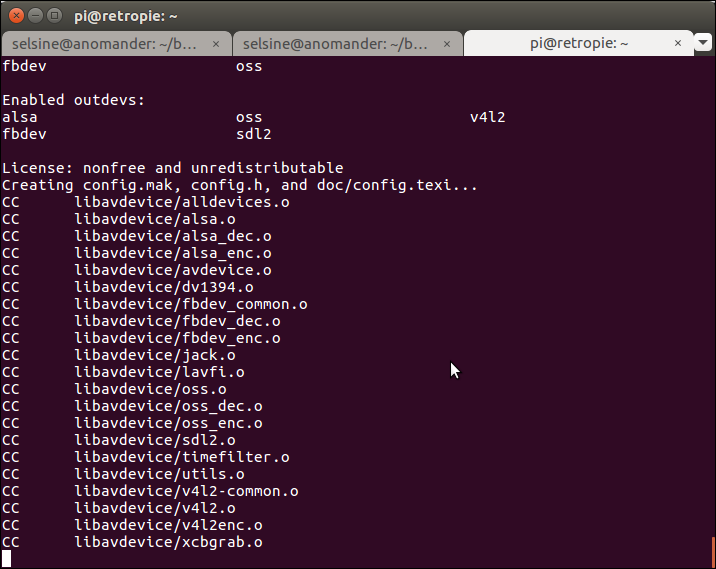
Now that we have our script, and it’s executable, we need to launch it as root:
$ sudo /home/pi/tools/ffmpeg-install.sh
Then we wait for a long time. I suggest having a beer while this compiles.
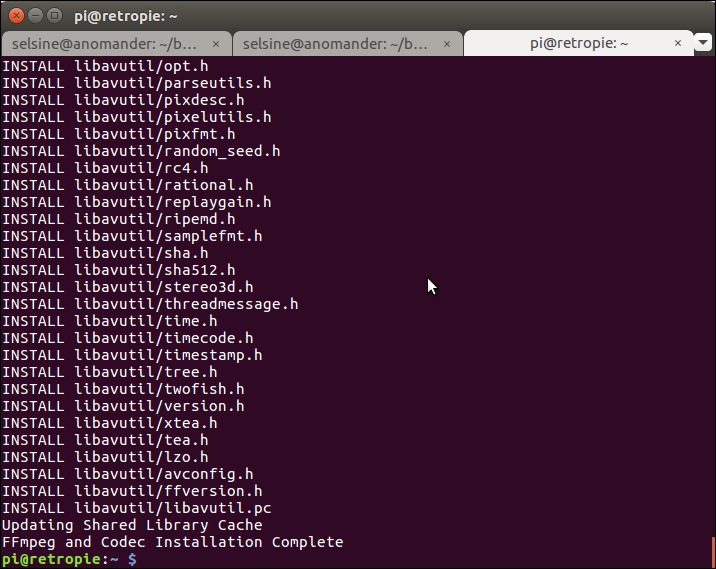
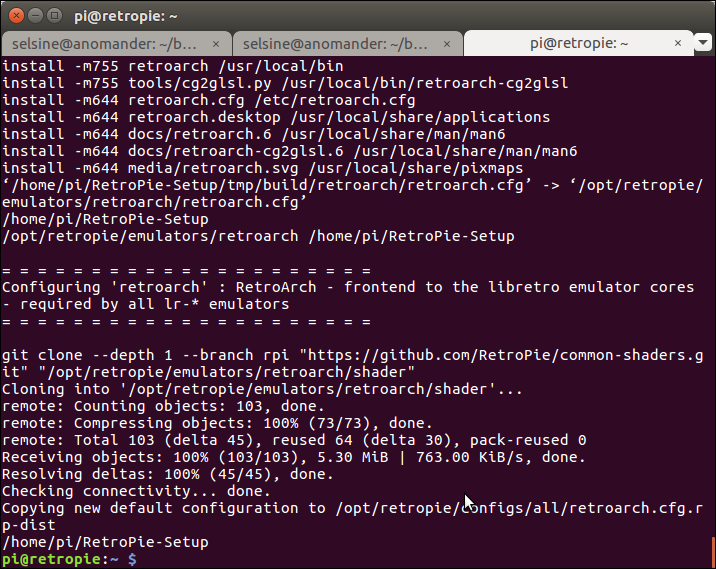
Fast-forward 1.5 hours on a Raspberry Pi 2 and the compilation and installation of FFmpeg is complete:
Re-Build RetroArch
Now that we have FFmpeg on our Raspberry Pie we need to rebuild RetroArch to take advantage of FFmpeg. We’re going to create a script to enabled the FFmpeg headers in RetroArch and then rebuild RetroArch in a very similar way to what we did above with FFmpeg.
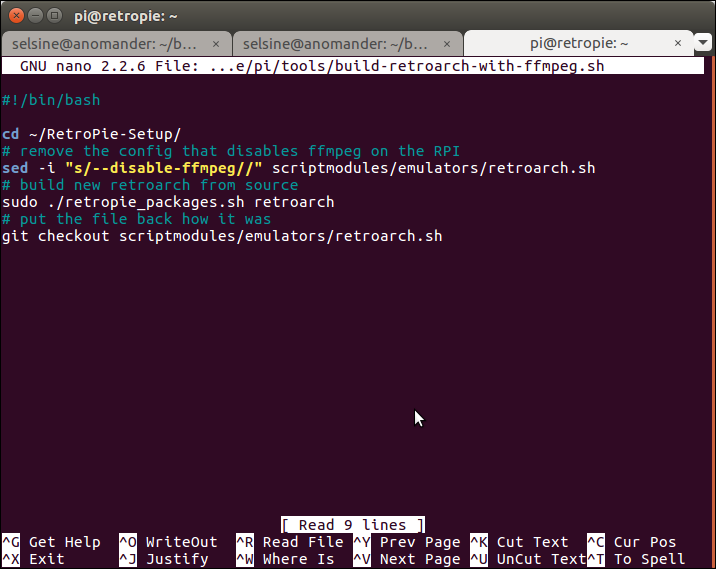
First we’ll create a build-retroarch-with-ffmpeg.sh script to do the work for us:
#!/bin/bash

cd ~/RetroPie-Setup/
# remove the config that disables ffmpeg on the RPI
sed -i "s/--disable-ffmpeg//" scriptmodules/emulators/retroarch.sh
# build new retroarch from source
sudo ./retropie_packages.sh retroarch
# put the file back how it was
git checkout scriptmodules/emulators/retroarch.sh
We now need to see if it worked by restarting the raspberry pie and then starting a game. Once the game has started hit select+X on your controller to bring up the RetroArch menu. For me the RetroArch menu was now lacking icons, but you need to select ‘Driver’ from the menu and then look at the ‘recording’ entry and verify that it says ‘ffmpeg’ instead of ‘null’
Mount a USB Drive for Recording
We are going to save our videos onto a USB drive connected to the Raspberry Pie. RetroResolution says that this is a better, more efficient, way to record the videos. If you want you can record to the SD card and skip this step.
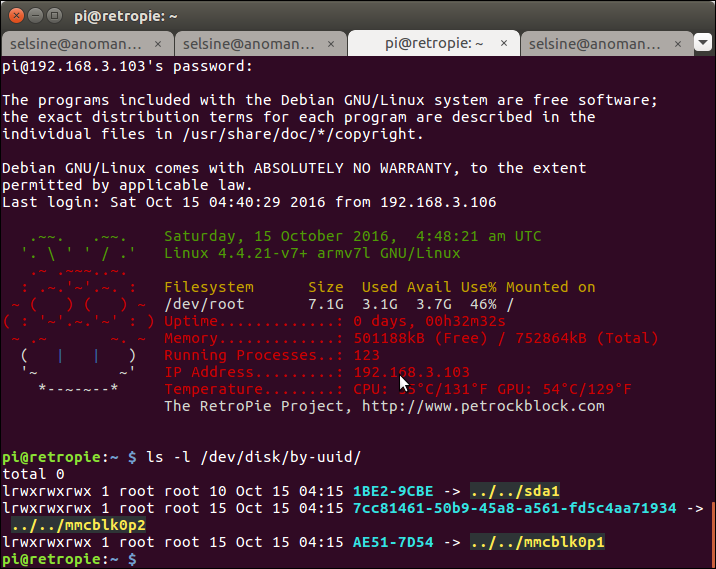
If we are going to save the videos on a USB drive we need to plug a USB drive into the Raspberry Pie and get the OS to mount it automatically at boot time. So plug the USB drive in, ssh into the Raspberry Pie, and then list all of the drives using the following command:
$ ls -l /dev/disk/by-uuid/
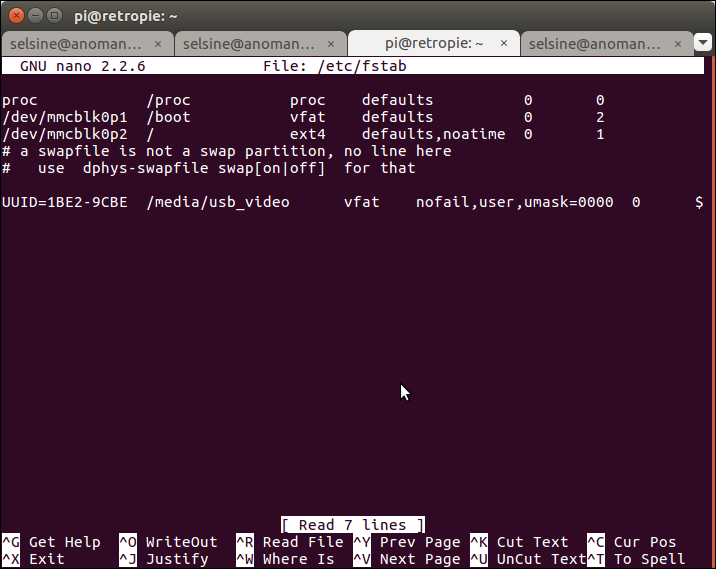
From my output I know that SDA1 is the drive that I want. So what I want to do is add the following line to my FSTAB file, using the UUID of the drive from the output to automatically mount my USB drive:
Note: The above command is for a USB device that is using the FAT file system. If your USB drive is NTFS, HFS+, EXT3, or any other file system you will have to use a different command. This article on ubuntu.com should help.
We will edit the fstab file as root using the following command:
$ sudo nano /etc/fstab
Then make our mount directory as root;
$ sudo mkdir /media/usb_video
We can test to make sure that our drive can be mounted using the following command, which we execute not as root, to be sure that the default pi user can mount the drive:
$ mount /media/usb_video/
If we don’t see an error the drive will be mounted on boot going forward.
Enable the Recording
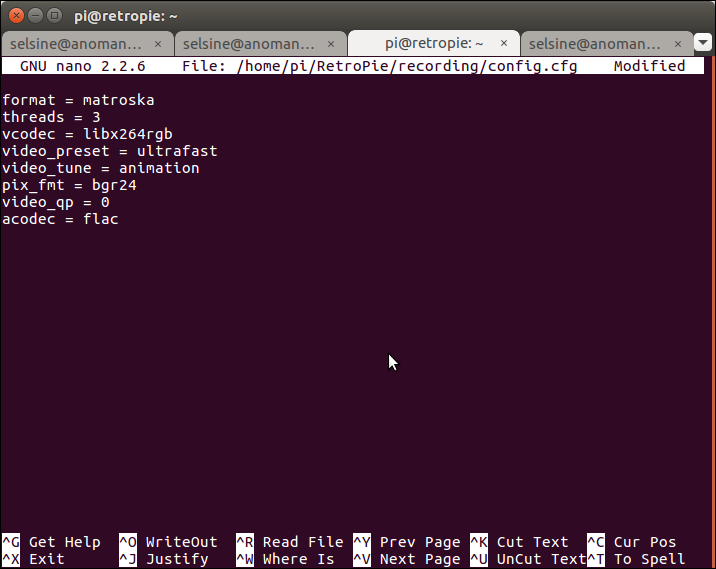
Now we have everything in place to start recording our games. The first step is to create a recording config file. This config file will tell FFmpeg which options we want during the recording.
Created the config file with the following command:
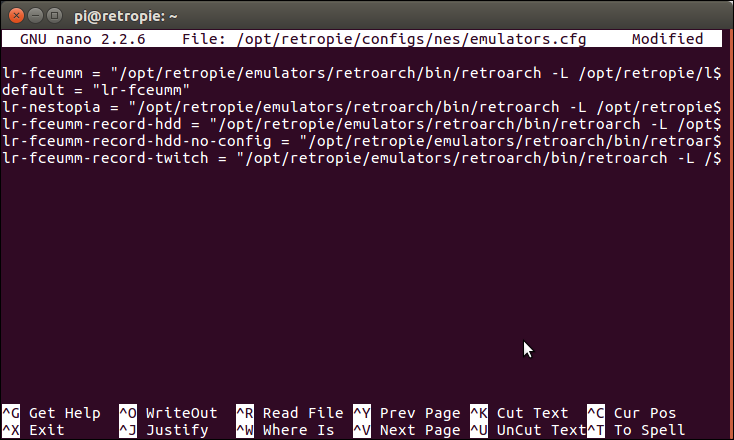
Now we need to tell RetroArch to record when we play the games from certain systems. To do so we need to edit the ’emulators.cfg’ file for each system. To start I’ll show you how to edit the NES config file.
Each system’s config file exists in the following path, where <> is the gaming system:
/opt/retropie/configs/<>/emulators.cfg
So for the original Nintendo we need to edit the following config file:
/opt/retropie/configs/nes/emulators.cfg
What we are going to do is add two entries that will launch an emulator and start a recording. Here is the command to edit the NES config file in nano:
$ nano /opt/retropie/configs/nes/emulators.cfg
We will add the following two config entries that will start a recording. The first will use the config file that we created above, and the second will record with the default FFmpeg settings:
Where we tell RetroArch to record a video and create a recording file on the USB drive that we mounted earlier. We use a timestamp in the file name: ‘$(date +%Y-%m-%d-%H%M%S)’ (which comes from a suggestion on the RetroPie forums) so that we don’t override any previous recordings.
This part of the first command tells FFmpeg to use our config file to configure itself:
Now launch an NES game and press ‘A’ while the game is loading. Then select ‘Select emulator for ROM’ (to make it ROM specific) or ‘Select default emulator for nes’ for all NES games, and pick one of the above options that we added. I suggest ‘lr-fceumm-record-hdd’. Play the game for a few seconds and then quit.
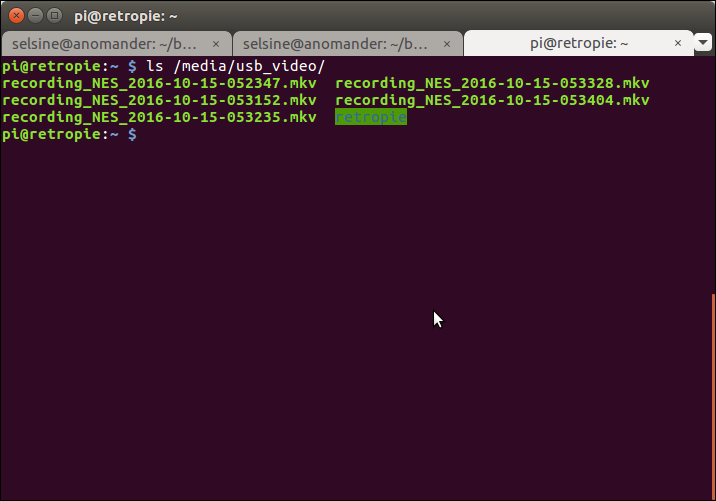
Now check the USB for the files:
$ ls /media/usb_video/
If all has gone well you should see one recordings from the game that you just played (I tested a few times so I have more that one recording):
That’s It
That’s it. If everything has gone well you should have an updated RetroPie that can now create gameplay videos. If you have any questions or run into any issues please leave a comment.
Be sure to checkout RetroResolution.com without whom getting this done would have taken a lot longer than it did.