Hunter x Hunter: Kindan no Hihou / Hunter’s Genealogy

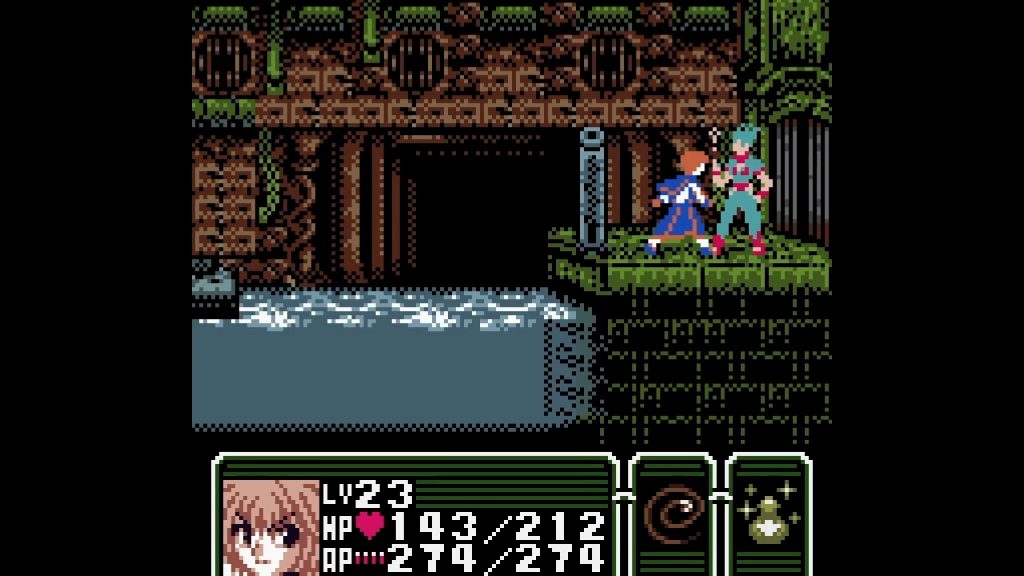
I’ve recently been playing Hunter x hunter: Kindan no Hihou on my YouTube channel. The game is an old Japanese game for the GameBoy color, and I’m using Google Translate in order to play the game.

The first boss in Hunter x Hunter: Kindan no Hihou

The game is based on the popular Manga written by Yoshihiro Togashi, and was originally released in Japan in 2000. The game is very much in the Metroidvania style of games, with a large inter-connected series of levels and different weapons and armour that can be used by the character.

You start off the game as Gon_Freecss for the first two levels, and then you get to play as Killua Zoldyck, then Kurapika, and then everyone’s favourite Leorio Paradinight. As you progress through the levels you also encounter many of the other characters from the Manga and Anime, some of them help you out, while others are there for the long cutscenes.

Kurapika encounters Hisoka in episode 13

What makes the game very difficult to play is that is is all in Japanese, a language that I don’t speak in any way shape or form. I compensate by using Google translate to try and understand what is happening in the game. The translations are often very poor but, so far at least, they have been good enough for me to progress through the game.

I’m not sure if the game is a good game or not, but I’m really enjoying playing it. It’s fun to try and understand what the plot of the game is as well as what the game is trying to get me to do, while at the same time playing the actual game, like I’m playing two games at once.

Killua attacking the third boss

So if you are interested in Hunter x Hunter, or retro gaming take a second to checkout my Hunter x Hunter: Kindan no Hihou playlist on my YouTube channel.

Selsine’s Retro Gaming YouTube Channel

I’ve decided to start recording the gameplay from of the classic video games from my youth. The first video game that I’m going to tackle is Super Mario Bros 2. You can can find all of the videos on my selsine YouTube channel.

Cover Art for Super Mario Bros. 2

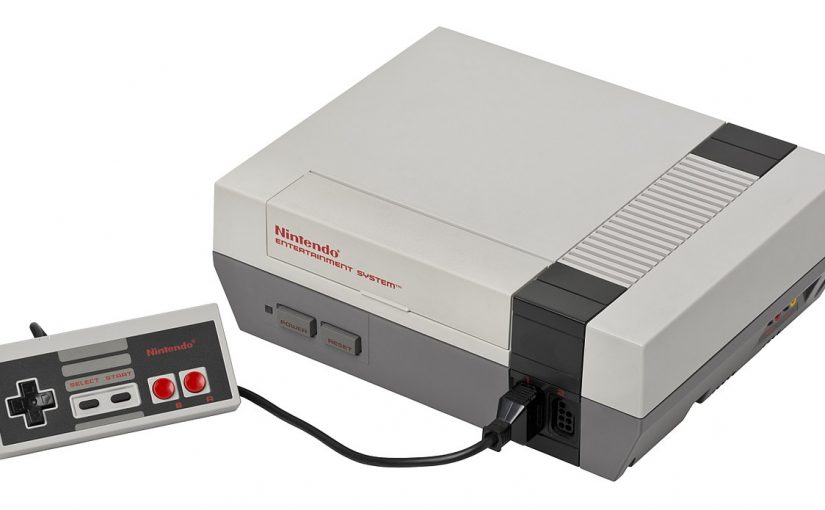
For now I’m going to focus on games from the Nintendo Entertainment System (NES) specifically, so if there are any NES games that you want me to play please let me know.

If you like watching old guys play video games please subscribe to my YouTube channel and let me know what you like and what you don’t like.

I’m doing this as part of my attempt to create more. I’ve been feeling a bit stuck lately (I wonder why) and I’m thinking that putting more out into the world will help. I know it’s going to be hard with kids and a full time job, so I’m going to start small. Trying to put out one video and one blog post a week. You’ll recognize my love to old video games in some of my older posts about recording game play on the RetroPi.

The nice thing about recording retro game play is that it has the added bonus of being fun to do at the same time.

We’ll see how it goes…

70% Hydration Sourdough Bread Recipe Recipe

Introduction

I’ve been making sourdough bread off an on for the last few years, making many bad and a few good, loaves of bread. This recipe is what I’m currently making and results in a loaf of bread that everyone in my family can enjoy.

Note: I’m going to slowly add some recipes to my blog. The real reason that I’m doing this is so that I will always be able to find them when I need to!

This recipe assumes that you already have an active sourdough starter ready to use. If you don’t have a starter it’s really easy to make one, all you need is a google search, flour, and water.

This recipe uses weight (grams) for its measurements instead of cups or spoons. I’ve found that makes a sourdough recipe easier to replicate and tweak the hydration levels. This is a 70% hydration recipe, which means that the amount of water used is 70% of amount of flour used. Using weight makes it easier to switch to a 65% hydration sourdough by simply decreasing the amount of water used or make a half batch.

I like 70% hydration as the crust of the bread ends up being soft and chewy as opposed to the crust of some of my earlier loaves that did not pass the kids test.

Continue reading 70% Hydration Sourdough Bread Recipe Recipe

Instant Pot Banana Oatmeal

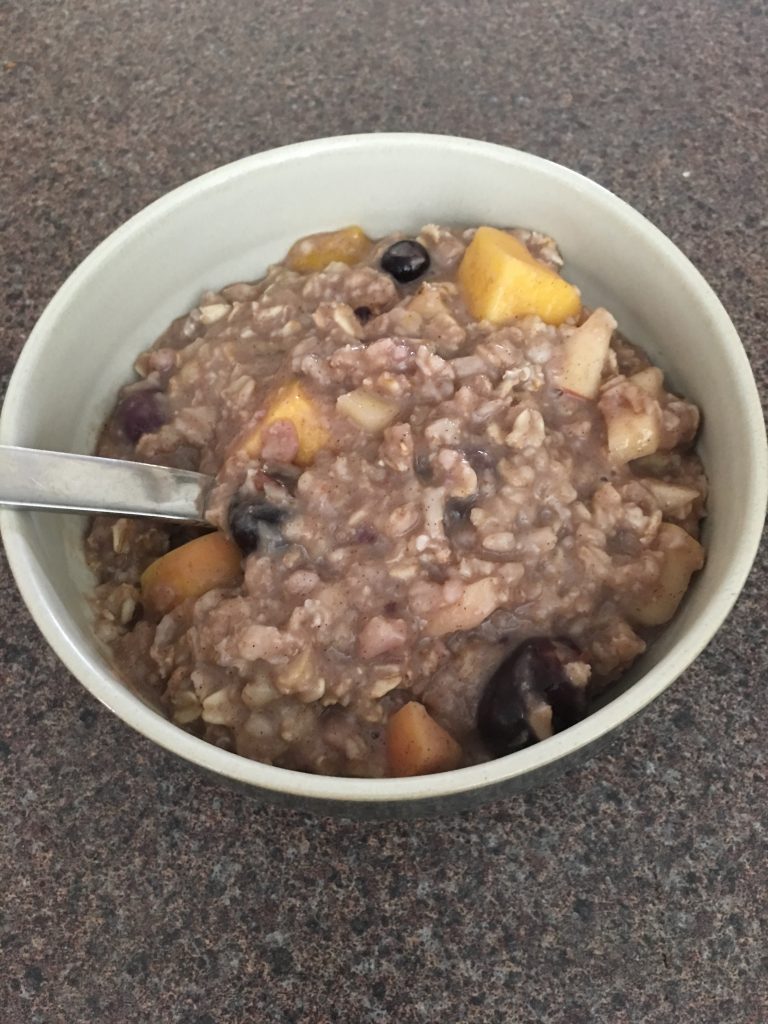
This is a bit of a left turn for this blog but I am posting here so that I don’t loose it. If you have an Instant Pot (or another pressure cooker I guess) and are interested in a tasty healthy breakfast give it a try. The mashed bananas are a really nice addition and are sweet enough so that you don’t need to add any sweetener. I often double this recipe up.

Ingredients

  • 2 bananas – nice and ripe, use frozen if you have them
  • 2 cup rolled oats
  • 3 1/3 cups water
  • 1 tsp vanilla
  • 1 tsp cinnamon
  • 1 – 2 cups frozen berries or fruit – whatever you like best
  • 1 apple – chopped

Directions

  1. Mash the bananas in a bowl until the lumps are gone. If you are using fresh bananas you could do this in the Instant Pot but I usually do it in the glass bowl that I used to microwave the frozen bananas.
  2. Core and chop the apple (no need to peel) and add it to the bananas.
  3. Add the vanilla and cinnamon to the banana apple mixture.
  4. Combine the oats and water in the Instant Pot.
  5. Add the apple banana mixture and the frozen fruit to the Instant Pot, give it a few good stirs so that it is well mixed.
  6. Close the instant pot (make sure it’s set to sealing) and use the manual setting on high pressure for 7 minutes.
  7. Let the pressure release naturally form the Instant Pot for about ten minutes.
  8. Scoop into a bowl and enjoy.

Yesterday I Bought My First Bitcoins

Yesterday I took the plunge and bought my first bitcoin, well my first tiny percentage of a bitcoin. I spent a little bit of money and purchased some Bitcoin, Ethereum, and Litecoin. Doing this right in the middle of the hype-cycle makes me feel like a bit of a cliché, but I’m trying to get over it. I am also still trying to get over my ignorance about how all of this works, and I’m hoping that the more I experiment and the more I blog, the more I will learn.

I purchased the currency as a way to get get started, I plan on transferring the coins to an exchange where I can then trade them for other coins and experiment with buying and selling.

I did it using CoinBase (Referral href=”https://www.coinbase.com/join/5a59a8fe64c54801f3706f7f”>link) and it only took me a few minutes once my account was setup.

There as some pros and cons (high transaction fees!) to using CoinBase, but one of the reasons I went with them was because they are backed by VC firm A16Z, who is large enough, and respected enough for me to trust. So I went with them even though there are others, because I was pretty sure that they were not going to steal my money. Prior to purchasing I read quite a bit online including the BitcoinCA subreddit.

Note: Don’t take me at my word though, if you are interested do your own research and pick a company or exchange that you are comfortable with. There is risk in all of this, and I am not an expert.

Doing this in Canada means that I will not be able to pull my money out of Coinbase directly, instead I will need to setup a wallet somewhere else, transfer my funds there, and then pull the money out.

Coinbase has an easy to use website and a very nice iOS app (the charts are excellent, and if you know me you know that I love charts). What you first need to do is create an account on CoinBase.com or within the app. Then you will need to verify your phone number. This is similar to two factor authentication. You give them your phone number, they text you a code, and then you open the code in your app in order to prove that you have access to the phone.

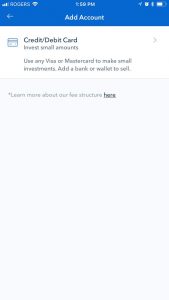
After that was setup the next step was to add a payment method. I added a credit card, but you can also choose to add a debit card.

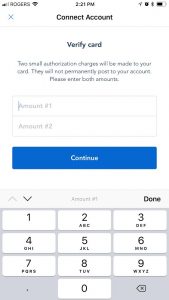
After you had added a payment method CoinBase will put two pending charges onto your linked account between $1.00 and $2.00 for additional verification. These charges will be refunded but you will need to log onto your credit cards or bank’s website and look for any pending charges.

Enter the two pending charges into the CoinBase app or website and you have successfully verified your payment account.

After that you are ready to buy some crypto. If you are in Canada like me it means that you can purchase a maximum of $250.00 per week, which is another reason to use a different site, but for me I just wanted to experiment so the low limit was acceptable.

At some point in time I am going to register for site that will allow me to extract my funds as Canadian dollars, but as I have heard that the verification times right now are exceptionally long, and I want to test out some exchanges first, I’m ok with this as a starting point.

I mentioned earlier in the post that CoinBase charges pretty high transaction fees, and in my three small transactions (purchasing Bitcoins, Ethereum, and Litecoin) I paid %5.39 in transaction fees. As a result of this, I’m not sure I would recommend going with them in the long run, however as a quick way to dip your toes into crypto currency CoinBase was pretty easy to use, and so far seems safe enough.

Also, I am in no way recommending that you invest in crypto currencies at the moment, I am only doing it as an experiment and only invested a small amount of money that I was comfortable losing.

My goal is not just to experiment in the buying and selling of crypto currencies, I also want to experiment with the underlying technology and code. This is the first step for me in understanding how to buy and sell currencies.

Bitcoins, Blockchains, and Cryptocurrencies Oh My!

The Introduction

We’re just half way into the first month of 2018 and if you follow tech in any way (even if you don’t) you’ve probably heard about Bitcoin and other cryptocurrencies. This is mainly due to their values exploding near the end of 2017 and all of the hype and confusion that generated.

This graph, showing the value of Bitcoin shows why there was so much hype:

Yahoo! Finance

As you see the price of a Bitcoin went from $5,917.16 USD November 6th, 2017 to $19,230.77 USD just over a month later on December 11th, 2017. Which works out to a 225% rate of return on your investment. That’s enough to get a lot of people talking and investing.

Of course for Bitcoin this really isn’t anything that new, back when it first hit $1,000 USD, I remember a similar (albeit smaller) level of hype. This time it feels different, maybe it’s the sheer number of “alt-coins” that have arisen, or perhaps it was the rise of the ICO’s (Initial Coin Offerings), but there seems to be more substance now, more legitimacy to what is happening. Or perhaps it’s just taken this next round of hype for me to look at it long enough to believe that there is some legitimacy. To be fair, like sharks to a feeding frenzy, all of this hype and money has attracted scam artists intent on making a quick buck from buzzwords and empty promises, so take my claims of substance with a more than a grain of salt for now.

The Reasons


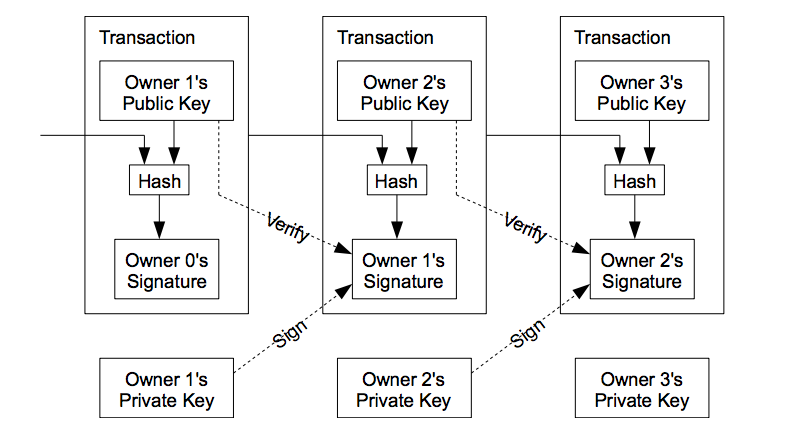
From Satoshi Nakamoto’s whitepaper

So why am I writing this blog post? Basically it’s because I don’t know anything about Bitcoin, the blockchain, trusted contracts, trusted contracts, nothing. But I want to learn. (That’s not totally true I have read Satoshi Nakamoto’s whitepaper.)

What I’m going to try to do over the next few weeks or months is to try to enter the cryptocurrency world, both from a monetary perspective and also from a technical perspective, all the while documenting my journey here.

For a variety of reasons what I want to do is give myself a project that will do the following:

  1. Get me writing again
  2. Learn something new and current

While at the same time learning more about:

  1. Bitcoin
  2. The blockchain (as a protocol, why do some very smart people think that this is the future of computing?)
  3. Trusted contracts
  4. Proof of work
  5. Ethereum, Ethereum tokens, and DAPPS (Decentralized Apps that run on the Ethereum protocol
  6. All the things I don’t even know yet

As well as basic things like:

  1. How to setup a bitcoin wallet
  2. How to mine a cryptocurrency
  3. How to trade cryptocurrencies.

I’m not yet sure how far I’ll go, or how technical the articles will be, but I’m excited to take another stab at blogging and learning again.

Till next time.

follow.trail on iOS

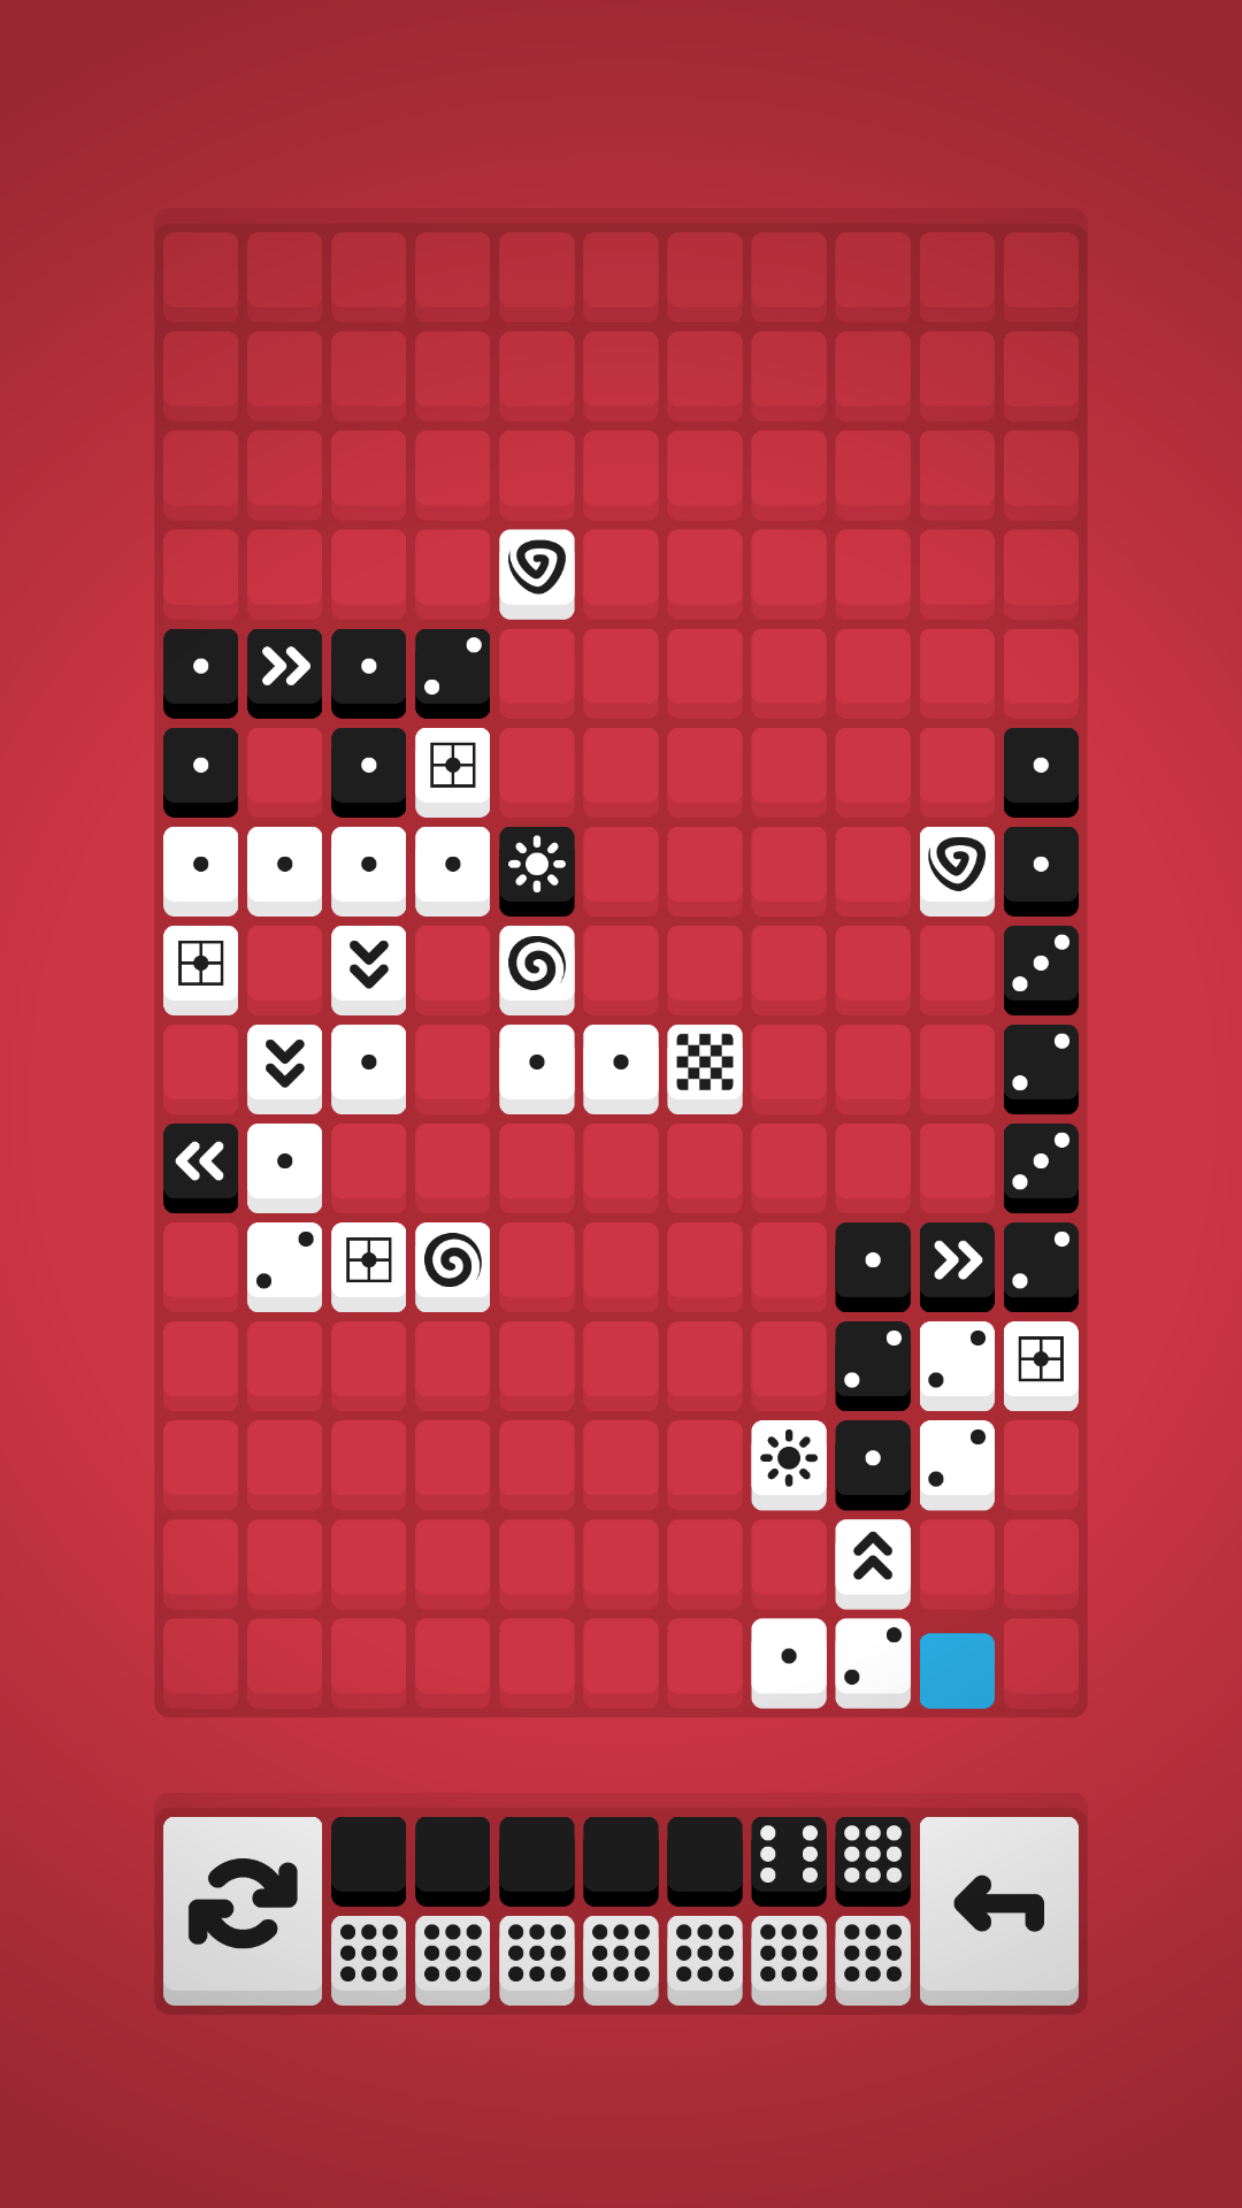
Today my buddy Greg released his first iOS game follow.trail. It’s a puzzle game where you attempt to clear the game board of all the black and white tiles before reaching the end tile. If you succeed then you move onto the next level, and if you fail you restart. The levels start out easy and then get more and more difficult (natch). 

I was lucky enough to be a part of his beta test and am the current follow.trail world record holder at level 69.

The game is $3.49 Canadian (I think, since I bought it I can’t check the price), $2.99 US, and worth every penny. No in-app purchase, ads, or anything like that just a straight-ahead puzzle game.  There may be some promo codes still available in a Touch arcade thread if you want to grab the game for free. 

So if you have an iPhone check out follow.trail and support your local indie dev. 

Oh and there is no Android version (or rain).

Friday Evening Tech Thoughts

It’s Friday night and I find myself watching playoff hockey, on my own, for the first time in what must be over a decade. 

In between periods the commentators come on and begin to discuss the game so far. The sound is off because we had been putting the kids to bed so I have no idea what the men in suits are saying. What I do notice, however, is the sponsor: Hauwei. 

My how times have changed. A global Chinese tech brand, mostly known for smartphones in the west, is sponsoring NHL hockey on the Canadian Public Broadcasting network. Tech, smartphones in particular are mainstream. I remember a few years ago, maybe 5, when people in the tech community still struggled to pronounce Hauwei…

This, and a conversation I had with my podcast cohost Ben Rogers, got me thinking, after what seemed like dull Google I/O and Microsoft Build events about the current state tech:

  • It feels like we are in the tech hangover after the smartphone high.
  • We are desperately searching for another reason to party but nothing seems to be lighting things up yet.
  • Bots, smart watches promised a lot and delivered very little.
  • Virtual Reality, people were so convinced that it was the future but like smart watches consumers don’t seem to be buying.
  • Artificial intelligence, machine learning? Is this the new electricity or another iteration in the long history of AI promises and failures? (I do think AI has legs this time due to hardware increases)
  • Augmented reality? More VR? Where are the consumers aside from the initial Pokémon Go hysteria?
  • Ambient computing? Of all of the tech listed here this seems like it has the greatest chance in the short term, but for all the hype the Alexa has still sold less than 10 million units. 
  • I am writing this on an iPhone. 

Just some thoughts after a long stressful week at work. 

Also the Senators lost to Pittsburgh…

How To Live Stream To YouTube from a RetroPie

In my last post I showed how you can live stream to Twitch from a RetroPie and in this post I will build off of that and show how you can stream to YouTube.

The basics of this guide are very similar to the Twitch guide so I suggest you give it a read as I will assume that you already know how to do things like ssh into your RetroPie and work with the config files.

First Things First

Before you can stream to YouTube you need to have your RetroPie setup to record gameplace. To do so follow the instructions in this post: How To Record A GamePlay Video From A RetroPie. Once that is working come back and get YouTube streaming working.

YouTube Account and Stream Key

The first step is to get your YouTube live account setup. To do so visit: https://gaming.youtube.com/ and click the “Go Live” button at the top right. If you don’t have a YouTube live account you will be prompted to create one.

screenshot-from-2016-10-17-19-20-13

Then go to your YouTube Live dashboard and scroll to the bottom of the screen. At the bottom of the screen you will see your Encoder Server URL and Stream key:

screenshot-from-2016-10-17-19-14-03

You will need to press the reveal button to actually get your YouTube Stream key. Keep that around but like your Twitch stream key do not share it with anyone.

Streaming Config File

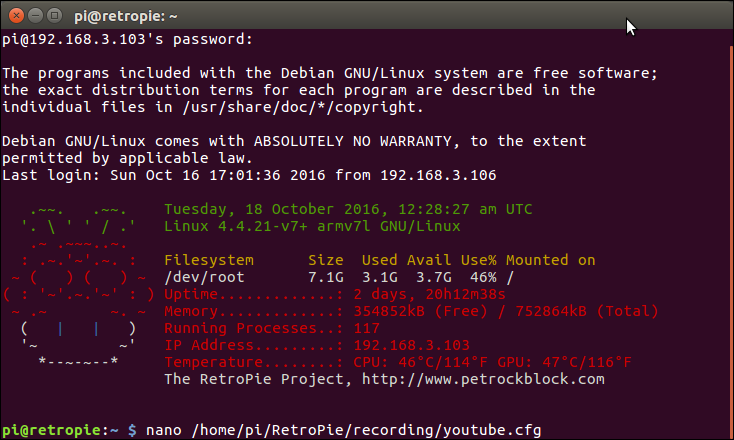
Now that our account is set up we will need to create an FFmpeg config file for our YouTube streaming. We could share the Twitch file but to make this guide easier we will create a new file, plus I think that their settings will need to be different. SSH into your RetroPie and create your YouTube config file with the following command:

$ nano /home/pi/RetroPie/recording/youtube.cfg

screenshot-from-2016-10-17-19-28-38

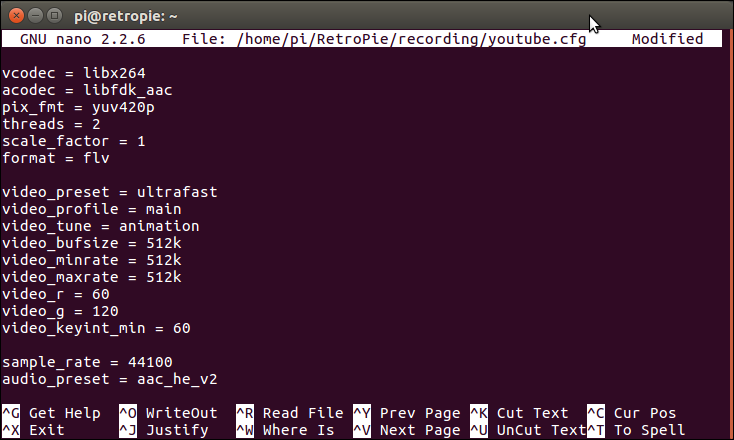
Then paste the following config settings into the file:

vcodec = libx264
acodec = libfdk_aac
pix_fmt = yuv420p
threads = 2
scale_factor = 1
format = flv
 
video_preset = ultrafast
video_profile = main
video_tune = animation
video_bufsize = 512k
video_minrate = 512k
video_maxrate = 512k
video_r = 60
video_g = 120
video_keyint_min = 60
 
sample_rate = 44100
audio_preset = aac_he_v2
audio_global_quality = 1

screenshot-from-2016-10-17-19-29-36

Then save (CTRL+O) and exit nano (CTRL+X).

Note: I’ve noticed that the video quality on YouTube using these settings is a little worse than what I was seeing on Twitch. So they will need to be tweaked a little bit in the future.

Emulator Configuration

Now we need to edit the config file for the emulators that we want to stream. More information on this can be found in my game play stream tutorial. All emulator config files can be found using the following path:

/opt/retropie/configs/$$SYSTEM$$/emulators.cfg

Where $$SYSTEM$$ is the name of the system that you want to configure. For this example we will be adding a YouTube livestream entry to the NES config file. To do so we edit it with the following command:

$ nano /opt/retropie/configs/nes/emulators.cfg

Then we will add a ‘lr-fceumm-record-youtube’ entry that will stream to YouTube:

lr-fceumm-record-youtube = "/opt/retropie/emulators/retroarch/bin/retroarch -L /opt/retropie/libretrocores/lr-fceumm/fceumm_libretro.so --config /opt/retropie/configs/nes/retroarch.cfg --record rtmp://a.rtmp.youtube.com/live2/$$STREAM_KEY$$ --recordconfig /home/pi/RetroPie/recording/youtube.cfg %ROM%"

Where:

rtmp://a.rtmp.youtube.com/live2/$$STREAM_KEY$$

is the YouTube URL we are streaming to and $$STREAM_KEY$$ is the YouTube stream key we got earlier.

And:

--recordconfig /home/pi/RetroPie/recording/youtube.cfg

tells FFmpeg to use the config file we created earlier.

Then save (CTRL+O) and exit nano (CTRL+X).

Streaming Your GamePlay

screenshot-from-2016-10-17-21-22-34

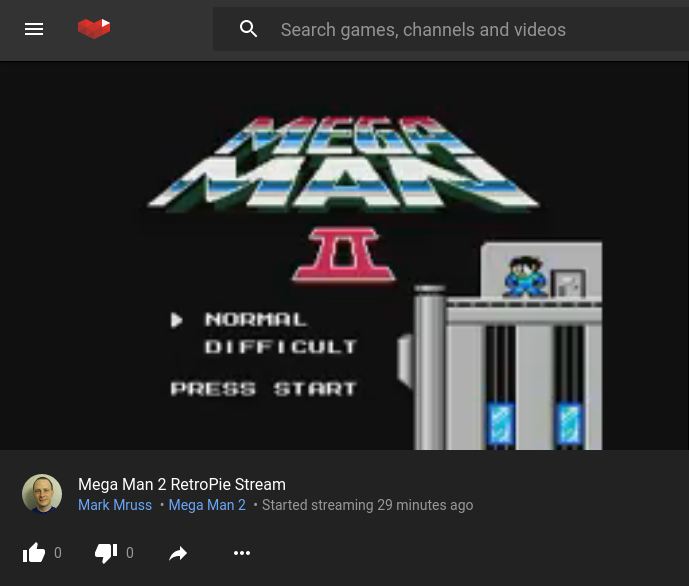
Now that we have everything setup we can stream to YouTube by starting a NES game and then pressing the ‘A’ button while the game is loading. This will load the configuration screen, from there select ‘Select emulator for rom’. You will now see the new ‘lr-fceumm-record-youtube’ entry that we added. Select it (it will now be the default so be sure to change it if you don’t want to stream next time you play) and when you launch the game you should now be streaming to YouTube.

That’s it.

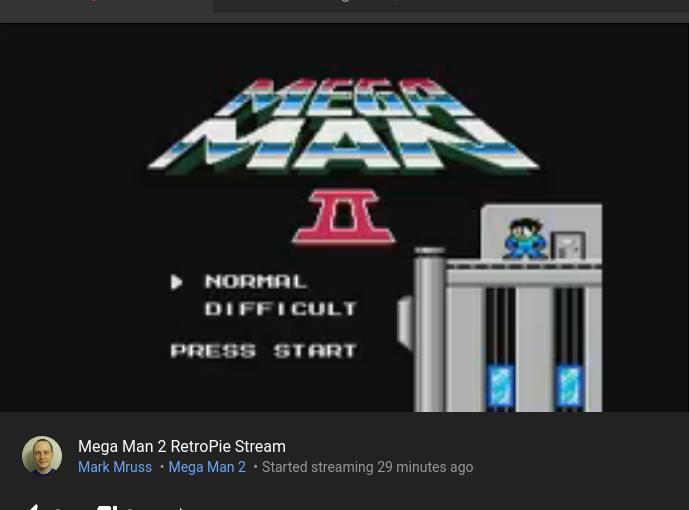
You can check out my live YouTube here: https://gaming.youtube.com/user/selsine/live

How To Live Stream To Twitch from a RetroPie

This article will show your how to live stream from your RetroPie directly to Twitch.com.

If you want to stream from your RetroPie to Twitch you will first need to get gameplay recording working (installing FFmpeg and rebuilding RetroArch with FFmpeg support) which you can do by following along with my earlier post: How To Record A GamePlay Video From A RetroPie

Once that is set up the next steps are pretty simple, I thought that it would be more difficult but it turns out it’s pretty straight forward to get a RetroPie to stream something to Twitch.

The big problem is the performance of the games as you are playing them. The performance is alright but I’d love to be able to up the quality a bit without having the games slow down as you play them, but I thought that I would post this and maybe a reader who knows FFmpeg better than I do could give me some tips.

Note: You can see my test stream here: https://www.twitch.tv/selsine

Assumptions

I’m going to assume that you can already ssh into your RetroPie and that you can already record gameplay videos. If not checkout my post: How To Record A GamePlay Video From A RetroPie or RetroResolutions: Recording Live Gameplay in RetroPie’s RetroArch Emulators Natively on the Raspberry Pi

Getting A Twitch Account and Stream Key

If you want to stream to Twitch you will need a Twitch account (of course) to do so visit: https://www.twitch.tv/signup and signup.

Once you have an account you will need your Twitch stream key. You can get this by visiting the ‘Stream Key’ tab on your twitch dashboard at the following URL:

https://www.twitch.tv/<>/dashboard/streamkey

screenshot-from-2016-10-16-11-56-58

From there hit the ‘Show Key’ button and grab your stream key.

Note: Keep your stream key private. Anyone that has it can stream to your Twitch account, and you don’t want that happening.

Twitch Config File

Now that we have our twitch account setup we will need to create a Twitch config file for FFmpeg so that the recordings it does are compatible with the Twitch servers.

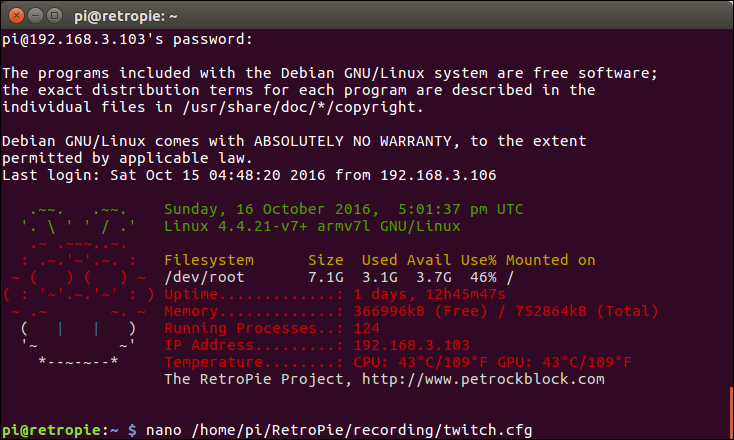
To do that ssh into your Raspberry Pi and use the following command to create the config file:

$ nano /home/pi/RetroPie/recording/twitch.cfg
screenshot-from-2016-10-16-12-02-37

I based my config file off of what I found on the RetroArch wiki however when ever I had my audio codex set to ‘libmp3lame’ I would get a “bus error” at the following location: ‘/opt/retropie/supplementary/runcommand/runcommand.sh: line 855: 16499’

Switching to ‘aac’ as the audio code solved the issue and got me streaming to Twitch, however there were lots of lag issues, so I spent a long time configuring the settings trying to get the games to play smoothly locally and stream at the same time.

In the end these are the settings that I settled on:

vcodec = libx264
acodec = libfdk_aac
pix_fmt = yuv420p
threads = 2
scale_factor = 1
format = flv

video_preset = ultrafast
video_profile = main
video_tune = animation
video_bufsize = 512k
video_minrate = 512k
video_maxrate = 512k
video_r = 60
video_g = 120
video_keyint_min = 60

sample_rate = 44100
audio_preset = aac_he_v2
audio_global_quality = 1

There is only a bit of audio distortion but the stream gets an excellent rating on Twitch.

Once you have pasted the above settings into your config file save (CTRL+O) and exit (CTRL+X).

Emulator Configuration

Now we need to add an entry into our emulator config file that will start a twitch stream rather than a regular recording or normal emulation.

Note: For more information on emulator config files checkout my first recording howto.

For this example we are going to edit the NES system’s config file using the following command (you have to ssh in):

$ nano /opt/retropie/configs/nes/emulators.cfg

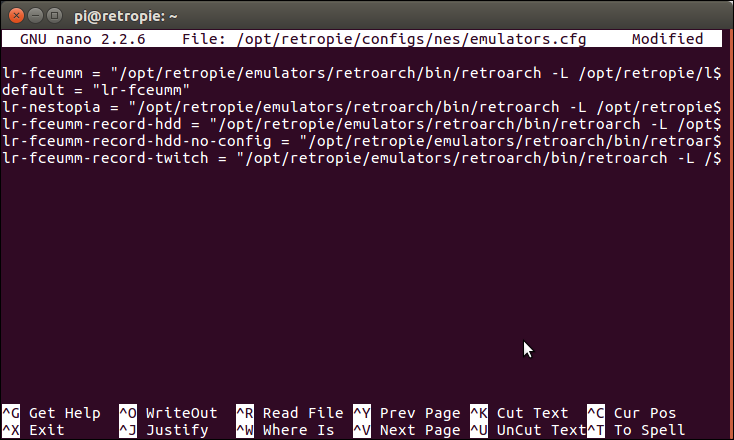
Then we need to add an entry that will stream to Twitch. We will call it: ‘lr-fceumm-record-twitch’ and we will use the following command:

lr-fceumm-record-twitch = "/opt/retropie/emulators/retroarch/bin/retroarch -L /opt/retropie/libretrocores/lr-fceumm/fceumm_libretro.so --config /opt/retropie/configs/nes/retroarch.cfg --record rtmp://live.twitch.tv/app/$$STREAM_KEY$$ --recordconfig /home/pi/RetroPie/recording/twitch.cfg %ROM%"

Where we specify the Twitch config file that we created earlier:

--recordconfig /home/pi/RetroPie/recording/twtich.cfg

And the RMTP Twitch URL that we will stream to:

--record rtmp://live.twitch.tv/app/$$STREAM_KEY$$

Where $$STREAM_KEY$$ is the stream key that you got from your Twitch account earlier.
screenshot-from-2016-10-16-12-13-12

Then save (CTRL+O) and exit (CTRL+X).

Note: You may want to check out the list of Twitch servers and choose one that is the closest to you.

Streaming Your Gameplay

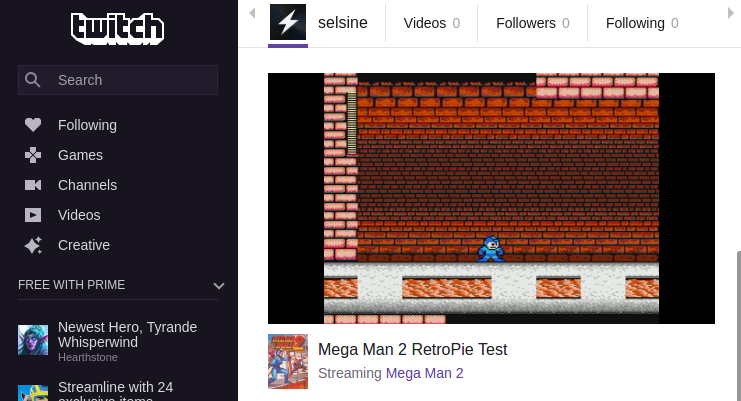
That’s it for the setup. Now you can go into the NES section on your RetroPie and start a game. While the game is loading hit the ‘A’ button to enter the configuration and select ‘Select emulator for rom’. There you will see the new ‘lr-fceumm-record-twitch’ entry that we added. Select it (it will now be the default so be sure to change it if you don’t want to stream next time you play.) and when you launch the game you should now be streaming to twitch.

You can check my stream to see if I’m playing anything: https://www.twitch.tv/selsine
screenshot-from-2016-10-16-20-07-41